Tips for Troubleshooting Your Pool Light
Posted by Dr Chlorine on Nov 1st 2020
Tips for Troubleshooting Your Pool Light
A glimmering pool light will add dazzling high notes to your poolscape; but a dim or broken light can leave you in the dark as to how to fix it. When your light goes kaput it is time to roll up the shirt sleeves, pull out the test probes and go to work.
But where to start? That is a tough question, as a pool light can have a hundred or so feet of cable, circuit breakers, GFCIs, and junction boxes to contest with. I’ve learned to start with the easy and then work your way up to the hard. We will walk through some simple fixes and some not so simple.
Loose Fixture
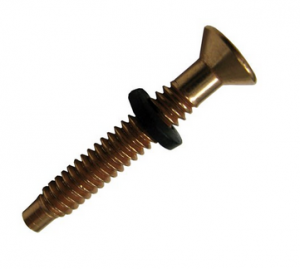
A pool light, despite all its waterproofing and hundred or so volts of electricity, is held into the pool wall by one bolt called the lockscrew. The lockscrew is located at the 12 o’clock position on the light fixture face. If the fixture wobbles when touched or a strong ripple hits it then a loose screw is likely the cause.
To fix the issue, dip into your pool with a phillips head screwdriver and tighten the screw. If the screw is stripped or lost, make sure you replace the screw and the gum o-ring. The o-ring is important to prevent excess water leakage into the niche or housing.
Leaky Pool Light
For the close observing swimmer, you may notice water in the light fixture. Most of the time, this issue is not discovered until  the bulb blows. As we all should know, water and light sockets do not mix.
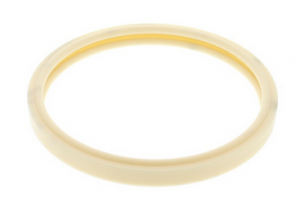
A leaky pool light stems from a bad lens gasket. This part is also called the housing gasket. The heavy gauge rubber ring acts as a clamp seal that waterproofs the joint between the lens and light housing. Chlorine exposure or old age can deteriorate the rubber to warp so that it allows water to reach the light internals. A fixture filled with water can also cause a breaker to trip, so be mindful of that when troubleshooting. Replacing a pools light lens gasket is pretty simple and even the more novice pool owners can do the job.
Another less likely cause of a pool light fixture leak is a power cord conduit seal leak. If the conduit seal degrades to that point, the light is likely dead and will require replacement.
Change the Bulb
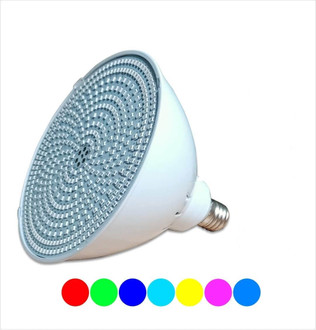
If your pool light will not turn on and you suspect the bulb, the old shake test is simple enough for any pool owner to do. The steps on the bulb shake test are simple: remove the light bulb from the fixture and shake it next to your ear. If you hear the ring-a-ting-ting of a broken filament then it’s time for a new bulb.
If the bulb was relatively new before it blew, I would not run out and replace it right away. A test of the circuitry may be necessary to be certain the new bulb will not be ruined by a power surge or some other electrical issue. Take a look at our guide on replacing a pool light bulb.
Bad Breaker
The actual task of checking the breaker is not the difficulty, mainly because the task consists of touching a couple probes to terminals. The usual hurdle homeowners have to overcome is getting a multimeter to complete the task. Your run of the mill meter can be found at a local hardware store or borrowed from friendly neighbor.
To test a single pull 120 Volt breaker we will need to remove the front panel of the breaker box to access the terminals. Before removing the panel, make sure to mark the switch that handles the light’s load.
The multimeter will have two leads: one Red lead (positive) and one Black lead (Negative or Ground.)The black lead is connected to COM port and the red to the mAVΩ port, the latter will be touched to the “hot” wire to measure volt load. Set the multimeter to read 120 Volt AC or higher so it can accurately read your breaker. Touch the red lead to the single pull terminal and the black lead to the neutral base row. The neutral row is normally labeled, but if it is not look for terminal row with the white wires.
Line Continuity
A pool light may have up to 200 feet of wire running from the power source to the fixture. Within that length of cable, there may be a fault in a junction, the line or the fixture. Checking line continuity is the process of finding the source of a fault in circuit. Again this task can be done with the handy dandy multimeter. We will be starting from a point in which we assume you have already checked the GFCI and breaker as mentioned earlier in this piece.
- Set the multimeter to read for 120 or 12-volt range for proper readings.
- Measure line voltage at junction box. A junction box is the point at which multiple electrical device cables can be joined to one main line. Not all applications utilize a junction so this step may not apply. If the junction reads 0 then the mainline leading to box is malfunctioning. Have an electrician inspect and install a new main line from box to breaker.
- Remove fixture from niche, then remove bulb from fixture, touch multimeter leads to fixture socket for reading. If the meter reads 0 from the socket, the fixture is dead and needs to be completely replaced.
As you can see the testing of a pool light is straightforward due to the simple nature of its design. One electrical circuit to the fixture allows for a relatively easy troubleshoot without hard labor. As with anything electrical, if you have any questions or reservations, ask a professional before fiddling with live wires. A working pool light is not worth risking electrocution.
